Shenzhen Kunpeng Core Technology Co., Ltd
Company Image

Bried adhering to the: Prompt delivery.service in place. think what you think.

Shenzhen Kunpeng Core Technology Co., Ltd
Trade Show

For job seekers to provide the latest and most recruitment information.

Shenzhen Kunpeng Core Technology Co., Ltd
Contact Us

If you have any questions. please do not hesitate to contact us.

Featured products

The Essential Building Block of Electronic Devices

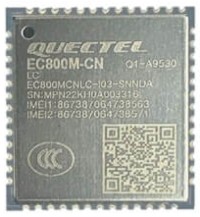
Shenzhen It is a technology enterprise focusing on industrial control boards.

Main business

PCB design and routing, BOM production, and drawing schematic diagrams; Design and development of various types of single-chip microcomputer.

Prototype production, commissioning, development and production; SMT/PCBA chip processing, welding debugging; Batch component supporting procurement;

Mass production of circuit boards, OEM/ODM foundry of various finished and semi-finished products; Medical equipment, industrial control board maintenance and maintenance

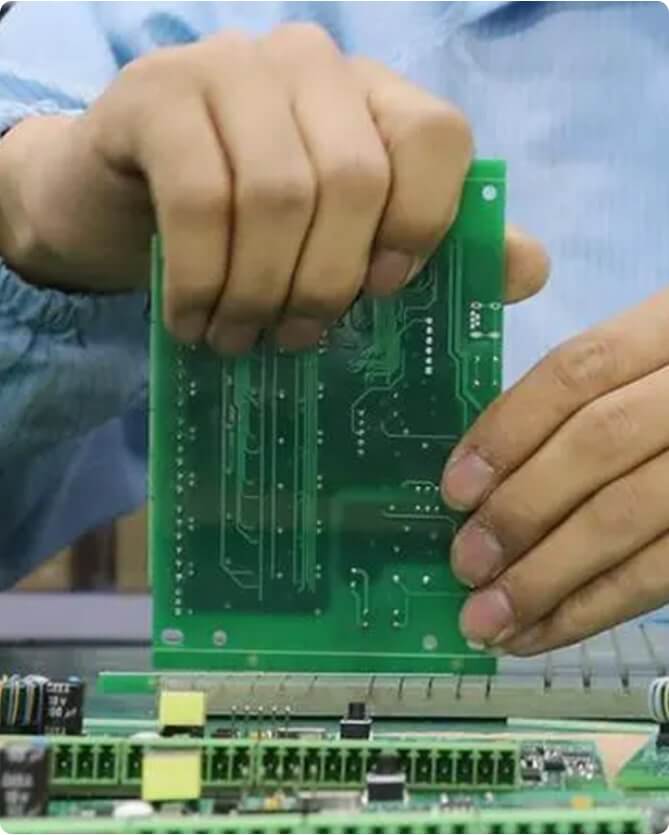
Printed Circuit Board

Chinese name is printed circuit board, also known as printed circuit board,

Shenzhen Kunpeng Core Technology Co., Ltd

Our Products

Shenzhen Kunpeng Core Technology Co., Ltd

Annex Building, Niulanqian Building, Minzhi Avenue, Minzhi Community, Minzhi Street, Longhua District, ShenzhenIt is a technology enterprise focusing on industrial control boards, medical equipment, rail transit, automotive electronics , R&D, production and service. The company has a professional technical team

About Us

Shenzhen Kunpeng Core Technology Co., Ltd.

Shenzhen Kunpeng Core Technology Co., Ltd

Business philosophy

The company takes "focus, intentions, quality, service" as its core value, and hopes to provide high-quality services through our professional level and unremitting efforts. Shenzhen Kunpeng Core Technology Co., Ltd. has been adhering to the needs of users as the core, attentive service has won the trust and praise of many industries, and gradually established a good brand of the company in Shenzhen.

What People say about Us

Our Blogs

23 Feb

Blogs

Maintaining good health involves monitoring vital signs, and one crucial aspect is monitoring blood pressure. The sphygmomanometer, a device used for this purpose, is a valuable tool anyone can learn to use effectively. In this comprehensive guide, we'll break down the steps to use a sphygmomanometer accurately, ensuring you can confidently monitor your blood pressure at home.

Understanding the Basics

Before delving into the practical steps of using a sphygmomanometer, it's essential to grasp the basics of this device. A typical sphygmomanometer consists of a cuff, a stethoscope, a rubber bulb, and a valve. Understanding the functions of these components is crucial for obtaining accurate blood pressure readings.

Different types of sphygmomanometers exist, each serving specific purposes. Whether it's an aneroid, mercury, or digital sphygmomanometer, knowing the distinctions helps users choose the most suitable for their needs.

How To Measure Blood Pressure?

Step 1: Raise Your Arm to The Heart Level

Start by positioning your arm at heart level to ensure the most accurate blood pressure reading. This step is critical for aligning the heart and the sphygmomanometer at the same height, allowing for precise measurements.

Raise Your Arm to The Heart Level

Step 2: Wrap The Cuff Around Your Arm

Selecting the right-sized cuff is essential for accurate readings. The cuff should wrap around the upper arm snugly, with the lower edge about an inch above the elbow. A proper fit ensures a secure seal and minimizes potential errors.

Step 3: Place the White Head of The Stethoscope On Your Arm

Identify the point on your arm where you will place the stethoscope. This is typically just below the cuff, over the brachial artery. Proper placement ensures you'll hear the blood flow sounds clear, known as Korotkoff sounds.

Place the White Head of The Stethoscope On Your Arm

Step 4: Take The Rubber Bulb And Tighten The Valve

The rubber bulb is used to inflate the cuff, and the valve is responsible for controlling the release of air. Before starting the measurement, ensure the valve is tightened to prevent air leakage during inflation.

Step 5: Inflate The Cuff And Then Release The Valve

Using the rubber bulb, inflate the cuff until it is snug but not overly tight. The pressure should be high enough to momentarily stop blood flow. Once inflated, gradually release the valve to allow the air to escape. The pressure on the cuff will decrease, and blood flow sounds will become audible.

Inflate The Cuff And Then Release The Valve

Step 6: Note Your Blood Pressure

As the cuff deflates, listen for the first sound (systolic pressure) and where the sounds disappear (diastolic pressure). Note these values and record them for future reference. Understanding the significance of systolic and diastolic pressure is crucial for accurately interpreting your blood pressure readings.

Interpreting Results

After obtaining your blood pressure readings, understanding their implications is essential. Systolic pressure represents the force exerted on the arterial walls during the heart's contraction, while diastolic pressure indicates the pressure when the heart is at rest between beats. Recognizing normal, high, and low blood pressure ranges is key to assessing cardiovascular health.

Consistent monitoring and trend analysis of your blood pressure readings provide valuable insights into your overall well-being. Regularly tracking these numbers allows you to identify potential issues early and take proactive measures to maintain healthy blood pressure.

Blood Pressure Range

Systolic

Diastolic

Normal Range

90 - 120

60 - 80

Elevated Blood Pressure

121 - 129

80 – 89

Stage 1 Hypertension

130 - 139

90 – 99

Stage 2 Hypertension

140 or higher

100 or Higher

Hypertensive Crisis

Higher Than 180

110 or Higher

Troubleshooting Common Issues

Even with proper technique, occasional issues may arise during blood pressure measurements. Common problems include cuff placement errors, stethoscope displacement, and inconsistencies in inflation and deflation. Understanding how to troubleshoot these issues ensures accurate and reliable readings.

Tips for Optimal Sphygmomanometer Use

Regular calibration and maintenance are crucial to maintain the accuracy of your sphygmomanometer. Choose the right type of sphygmomanometer for your needs, whether for personal use at home or in a professional medical setting. Seeking professional guidance for initial training ensures that you have a solid foundation for using the device effectively.

Conclusion

Mastering the art of using a sphygmomanometer empowers individuals to take control of their cardiovascular health. You can confidently and accurately measure your blood pressure by following the step-by-step guide. Remember, consistent monitoring, proper interpretation of results, and troubleshooting common issues are integral to making the most of this valuable health monitoring tool. As you embark on this journey, you're not just measuring numbers but actively participating in your well-being.

23 Feb

Blogs

One essential tool that has stood the test of time in providing accurate blood pressure measurements is the Aneroid Sphygmomanometer. This article aims to delve into the myriad benefits of using this device, shedding light on its accuracy, non-invasiveness, portability, ease of use, and immediate results.

Accuracy

At the heart of every healthcare professional's toolkit is the quest for accuracy in vital sign measurements. Aneroid Sphygmomanometers have become synonymous with precision in blood pressure monitoring. Utilizing a mercury-free gauge, their mechanism ensures reliable readings crucial for diagnosing and managing various medical conditions.

The accuracy of Aneroid Sphygmomanometers is especially evident when compared to alternative blood pressure measurement methods. Unlike invasive techniques like arterial catheterization, which pose inherent risks, aneroid devices provide a safer and equally precise alternative, ensuring the well-being of patients without compromising accuracy.

Non-invasiveness

Imagine a blood pressure measurement method that eliminates the discomfort of invasive procedures. Aneroid Sphygmomanometers offer a non-invasive approach that doesn't require breaking the skin or entering the body. This enhances patient comfort and minimizes the risks associated with invasive methods.

By avoiding the complexities and potential complications of invasive techniques, aneroid devices have become a staple in healthcare settings where patient well-being is of utmost importance. The non-invasiveness of these devices not only contributes to a positive patient experience but facilitates more frequent monitoring without causing unnecessary distress.

Portability

Flexibility in healthcare is crucial, and Aneroid Sphygmomanometers have embraced the need for portability. These devices are not confined to the walls of a clinic or hospital; they can be easily transported to different locations. Whether in a medical facility, a remote clinic, or at home, these portable devices make blood pressure monitoring convenient and accessible.

The portability of aneroid sphygmomanometers empowers healthcare professionals to extend their services beyond traditional settings. Additionally, individuals can take charge of their health by monitoring blood pressure at home, fostering a proactive approach to well-being.

Ease of Use

In a world where time is of the essence, the simplicity of aneroid sphygmomanometers cannot be overstated. These devices are designed to be user-friendly, eliminating extensive training needed to operate them effectively. Healthcare professionals and individuals with basic training can use aneroid devices confidently, making blood pressure monitoring accessible to a broader audience.

The ease of use extends beyond medical professionals to encompass at-home monitoring. Aneroid sphygmomanometers empower individuals to actively participate in their health management, fostering a sense of responsibility and awareness regarding their blood pressure levels.

Immediate Results

The swiftness with which Aneroid Sphygmomanometers provide blood pressure readings is a game-changer in medical examinations. Immediate results offer healthcare providers real-time insights into a patient's cardiovascular health, enabling prompt decision-making and intervention if necessary.

During medical examinations, the ability to assess blood pressure instantaneously adds a layer of efficiency to the diagnostic process. This real-time feedback streamlines healthcare delivery and enhances the overall quality of patient care.

Maintenance and Longevity

Investing in healthcare equipment requires a consideration of maintenance and longevity. Aneroid sphygmomanometers, with proper care, demonstrate a remarkable lifespan. Maintenance is relatively straightforward, involving regular checks and proper storage, ensuring the longevity of these devices.

Compared to other blood pressure measurement devices, aneroid sphygmomanometers are cost-effective over time. Their durability and minimal maintenance requirements contribute to a positive return on investment for healthcare institutions, making them a practical choice in resource management.

Conclusion

In conclusion, the benefits of using Aneroid Sphygmomanometers extend beyond their role as blood pressure measurement tools. Their accuracy, non-invasiveness, portability, ease of use, and immediate results contribute to a holistic approach to healthcare. By prioritizing these devices, healthcare professionals and individuals alike can embrace a future where blood pressure monitoring is accurate but also accessible and comfortable. Let's champion using Aneroid Sphygmomanometers, ensuring that the pulse of our health is measured with precision and care.

23 Feb

Blogs

In the vast landscape of electronic innovation, the unsung heroes are the PCB designers, weaving the intricate threads that connect our devices seamlessly. To embark on this journey of precision and creativity, one must wield a pencil and paper and a comprehensive toolkit. Let's delve into the world of PCB design, exploring the essential tools, troubleshooting techniques, and common pitfalls that every designer should be acquainted with.

Gather Tools

Imagine an artist without brushes or a chef without knives – a PCB designer without the right tools faces a similar dilemma. Your arsenal should be rich with a hot air gun, tweezers, scissors, a craft knife, a soldering gun, a paper clip, a pen, C-clamps, flux, solder, soldering iron, a microscope, and wipes. Each tool is a brushstroke in your design canvas, bringing life to the intricate connectivity patterns.

Visually Inspect for Defects

Before plunging into the labyrinth of circuitry, a designer's keen eye must scan the PCB surface for imperfections. Visual inspection becomes an art, where irregularities reveal themselves as puzzles waiting to be solved. Through this meticulous scrutiny, designers set the stage for a flawless canvas upon which innovation can flourish.

Analyze the Fault

Facing an issue is not a roadblock but an opportunity to unravel the secrets of the circuit. Analyzing the fault is akin to deciphering a cryptic message – carefully tracing the anomaly back to its origin. This step, often overlooked, serves as the foundation for effective troubleshooting, transforming a seemingly complex problem into a solvable puzzle.

Steps to Troubleshoot the Most Common Issues

PCB Cleaning

The journey begins with a clean slate. Gently, yet assertively, wipe away any impediments on the PCB surface. Dust, debris, and residues – the foes of precision – are banished, leaving a pristine canvas ready for the designer's touch.

Remove Damaged Pad

In the intricate dance of design, damaged pads are like missteps that need correction. With the precision of a surgeon, use a craft knife or scissors to delicately remove the flawed pad, ensuring the surrounding components remain unscathed.

Clear Laminate Around the Pad

Clearing the laminate around the removed pad is akin to creating space for a new beginning. Like a sculptor, the designer carves out a clean and receptive area, laying the foundation for the renewal of connectivity.

Strip Off Old Solder Mask

In PCB design, the old must make way for the new. Strip away the remnants of the old solder mask, unveiling a fresh canvas. This act of renewal sets the stage for a design that stands the test of time.

Clean Using Alcohol

Isopropyl alcohol becomes the purification elixir, cleansing the exposed area of any remaining residues. The designer, a purveyor of purity, ensures the path is clear for the connectivity journey.

Prepare the Conductor

With the precision of a conductor orchestrating a symphony, evaluate the circuit and prepare the conductor for the new connection. Each movement is deliberate, ensuring that the backbone of the design is robust and resilient.

Evaluate and Select the Suitable Circuit Frame

A PCB designer meticulously chooses a circuit frame just as a painter selects the perfect canvas. Compatibility is the key – a circuit frame that aligns seamlessly with the specifications of the PCB and the desired functionality.

Ready the New Pad/Conductor

The canvas is set, the conductor prepared – it's time for the magic to unfold. The new pad or conductor is integrated into the PCB with precision in every movement, ensuring the perfect fit for a seamless design.

Solder the New Pad

In the delicate dance of connectivity, soldering becomes an art form. Employing skills akin to a blacksmith forging a masterpiece, the designer seamlessly attaches the new pad or conductor, each connection a testament to the artistry of precision.

Secure and Allow to Dry

With the design complete, the final touch is patience. Secure the newly soldered pad or conductor, allowing the solder to dry and the connection to solidify. It's a moment of quiet satisfaction, knowing that artistry and precision have converged to create something enduring.

Common Issues with PCB

Bad Soldering

Within the intricate dance of soldering lies the potential Achilles heel – bad soldering. Irregular shapes, incomplete connections, or excessive solder can disrupt the harmony. Revisiting the soldering process and recalibrating the technique are the remedies to restore the equilibrium.

Silvers

Silvers, like elusive shadows, can tarnish the brilliance of a design. These shiny intruders, also known as silver migration, pave the way for short circuits. Preventive measures, such as conformal coating, become the shield against silvers' incursion, ensuring the design's longevity.

Cold Joints

Cold joints, where connections turn icy and unyielding, stem from insufficient heat during soldering. The remedy lies in revisiting the soldering process, infusing warmth and precision into each joint. It's the thawing of connections, a return to the fluidity essential for effective conductivity.

Acid Traps

In the world of PCBs, corrosive substances can become treacherous traps during the manufacturing process. Thorough cleansing and neutralization of affected areas become the antidote, preventing further corrosion and securing the longevity of the design.

Starved Thermals

Starved thermals, like parched landscapes, can hinder heat flow and compromise the performance of the PCB. The remedy lies in ensuring adequate thermal relief for components, nourishing the connectivity, and allowing for efficient heat dissipation.

Burned Components

Burned components, the scars of electrical battles, can compromise the functionality of the PCB. It's a call to action – a replacement of damaged components and an investigation into the root cause to prevent the recurrence of fiery challenges.

Conclusion

In the tapestry of technology, PCB designers are the master weavers, crafting connections that power our world. With a toolkit, a keen eye, and troubleshooting prowess, designers navigate the complexities of PCB design. Each stroke of precision, each connection forged, becomes a testament to the artistry of innovation. So, let the journey continue – designing excellence, one PCB at a time. 

23 Feb

Blogs

PCB (Printed Circuit Board) design is both an art and a science, demanding meticulous attention to detail and a comprehensive understanding of electronics. In this article, we delve into the essential practices for successful PCB designs, offering invaluable insights for designers navigating the complexities of electronic circuits.

Practices for Successful PCB Designs

Successful PCB designs are rooted in a thorough understanding of fundamental principles and industry best practices. From component placement to routing strategies, meticulous attention to detail is paramount. Designers should prioritize signal integrity, thermal management, and manufacturability. Adopting a systematic approach encompassing schematic design, layout optimization, and thorough testing is essential for achieving robust and reliable PCB designs.

Understanding the Complexities of PCB Design

The landscape of PCB design is rife with complexities, ranging from high-speed signal propagation to impedance-matching challenges. Designers must navigate many considerations, including layer stack-up configuration, routing topologies, and EMI/EMC mitigation techniques. By embracing a holistic understanding of PCB design principles and leveraging advanced simulation tools, designers can mitigate risks and optimize performance across diverse application scenarios.

Collaborative Strategies for Effective PCB Development

Effective collaboration lies at the heart of successful PCB development. Engineers, designers, and stakeholders must work together, fostering open communication channels and leveraging each other's expertise. Cross-disciplinary collaboration with mechanical designers ensures seamless integration between PCB layouts and enclosure designs, minimizing potential conflicts and streamlining product development.

Mastering Signal and Power Integrity

Signal and power integrity are linchpins of PCB design, exerting a profound influence on system performance and reliability. Designers must meticulously manage signal traces, power delivery networks, and ground plane structures to mitigate signal distortion, voltage sags, and electromagnetic interference. By employing impedance control techniques, decoupling capacitor arrays, and robust power distribution strategies, designers can safeguard signal integrity and enhance overall system robustness.

Coordination with Mechanical Designers

Harmonious coordination between PCB and mechanical designers is indispensable for realizing cohesive and functional electronic products. Aligning PCB footprints with mechanical constraints, tolerances, and assembly requirements ensures optimal fit, form, and functionality. Organizations can expedite time-to-market, minimize redesign iterations, and enhance overall product quality by fostering synergy between mechanical and electrical design teams.

Footprint Verification and 3D Components

Accurate footprint verification and 3D component modeling are pivotal stages in the PCB design lifecycle. Designers must meticulously validate component footprints against datasheet specifications and IPC standards, preempting potential footprint errors and assembly issues. Integration of 3D component models enables designers to visualize spatial clearances, collision zones, and thermal profiles, facilitating informed design decisions and preempting costly redesigns.

Strategic Use of Autorouting in PCB Layouts

Autorouting algorithms offer a double-edged sword, promising efficiency gains while potentially compromising signal integrity and manufacturability. Designers must judiciously evaluate the suitability of auto-routing techniques based on design complexity, signal integrity constraints, and manufacturing requirements. Manual intervention and post-routing optimizations are pivotal in fine-tuning autorouted designs, balancing efficiency and design integrity.

Critical Steps in Wiring (Prioritizing Traces for Efficiency)

Wiring topology and trace routing constitute pivotal aspects of PCB layout optimization. Designers must prioritize critical signal paths, high-speed interfaces, and power distribution networks to minimize signal degradation and ensure robust performance. Techniques such as differential pair routing, controlled impedance traces, and length matching are instrumental in preserving signal integrity and minimizing electromagnetic interference.

Testing

Comprehensive testing serves as the litmus test for PCB design integrity and functionality. To validate design performance across diverse operating conditions, designers must conduct tests, including electrical continuity checks, signal integrity analysis, and thermal profiling. Prototyping and iterative testing cycles empower designers to identify and rectify design flaws early in development, mitigating risks and ensuring product reliability.

In conclusion, mastering PCB design requires a blend of technical insight, strategic foresight, and collaborative spirit. By embracing best practices, leveraging advanced tools, and fostering interdisciplinary collaboration, designers can navigate the complexities of PCB design with confidence and precision, ushering in a new era of innovation and excellence in electronic design.